Open brief setup
Your brief settings live in one place, and you can get there four ways:
- On the Briefs page, click Configure my brief. If you don’t have a brief yet, click Set up my brief.
- In an open brief, click the gear button.
- In any brief email, click Configure your brief at the bottom and sign in.
- In Settings → Users, click the Briefs cell next to your name.
Setup is a short series of screens titled Set up your brief, or Edit your brief if you have one. When you’re editing, your current settings are filled in. Click Continue to move on and Back to go back. Nothing is saved until the last screen.
Pick sections and projects
Sections
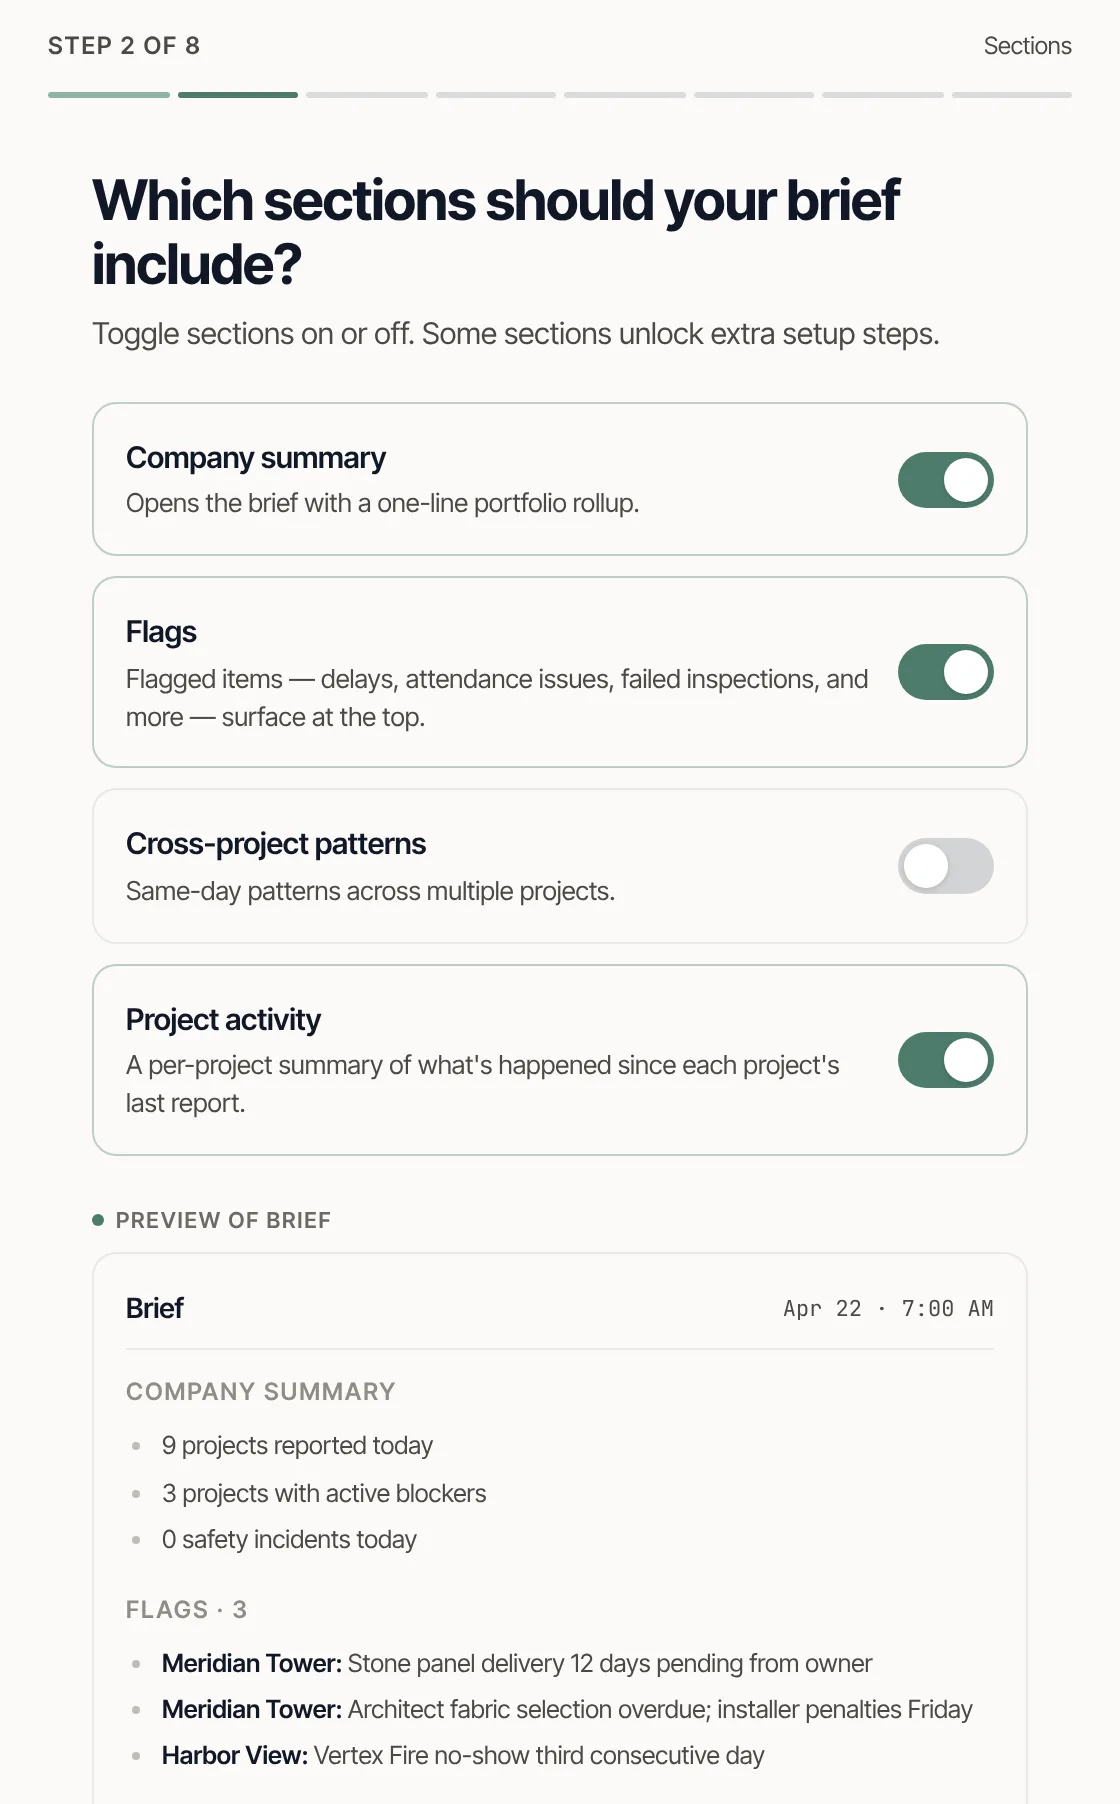
Turn on the sections you want: Company summary, Flags, Cross-project patterns and Project activity. A new brief starts with only the company summary on. The Preview of brief below the switches updates as you go. You need at least one section on to continue. For what each one covers, see Briefs explained.
Two sections add a screen to setup. Flags adds Flag conditions, and Project activity adds Project ordering. Turn one off later and its choices are kept, ready for when you turn it back on.
Which projects
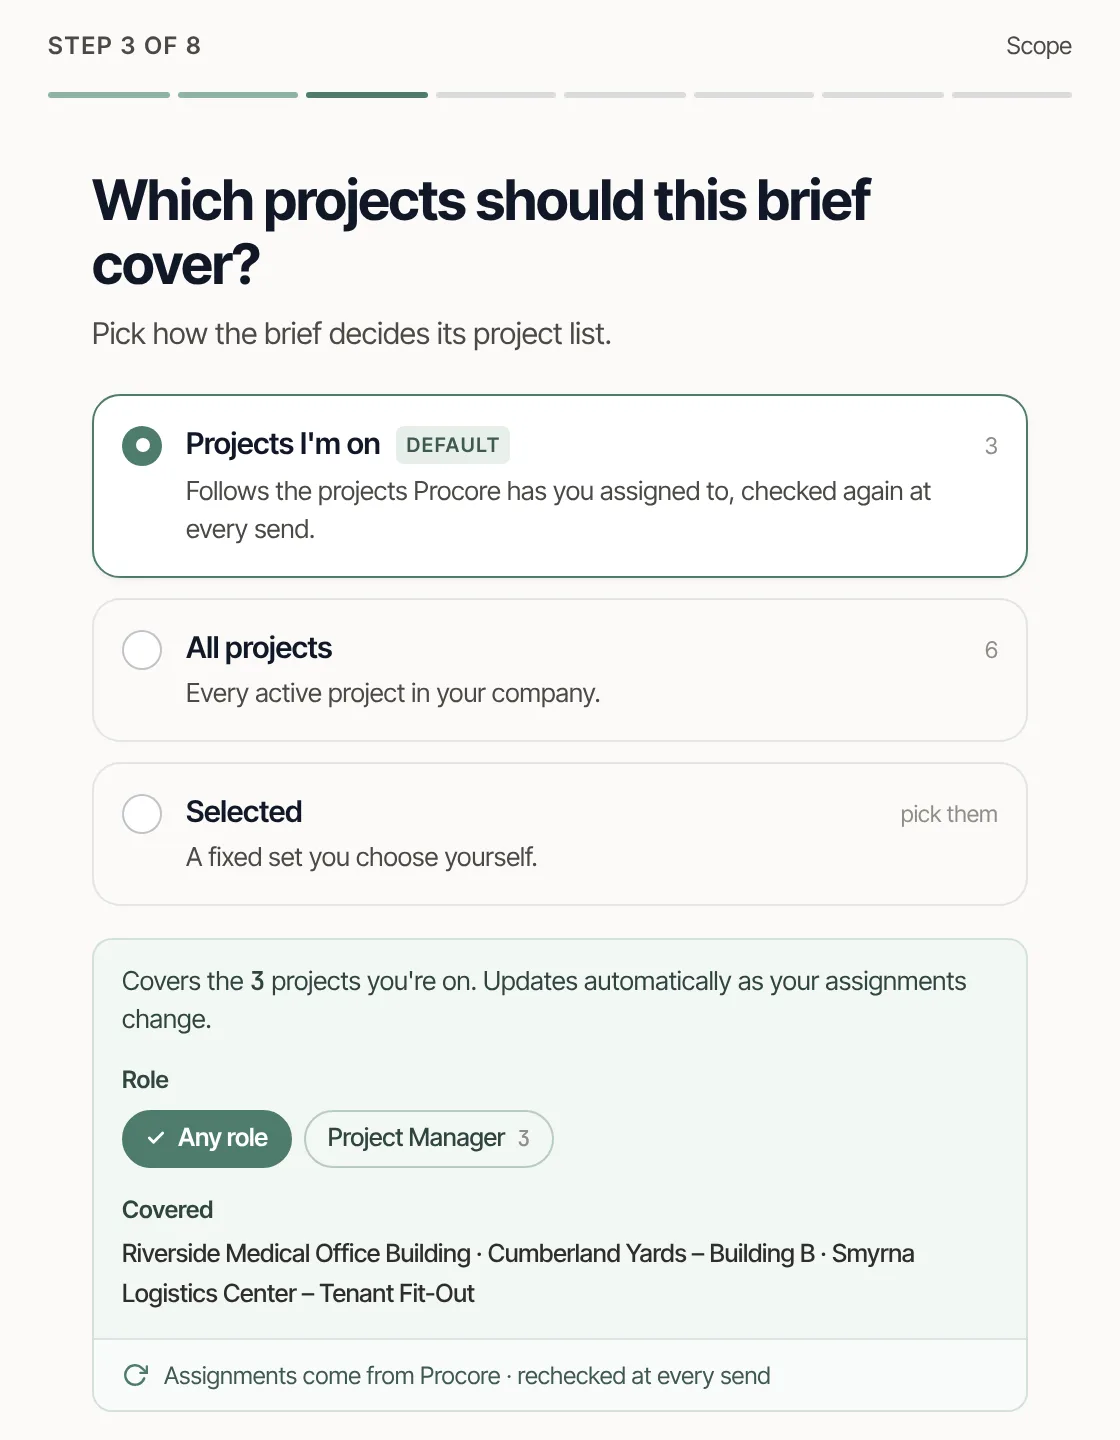
Under Which projects should this brief cover?, pick one:
- Projects I’m on follows the projects Procore or Autodesk has you assigned to. It’s checked again at every send, so a new assignment shows up without you touching anything.
- All projects covers every active project in your company.
- Selected is a fixed list you choose. Use the search box or Select all, and pick at least one.
With Projects I’m on, you may also see a Role row. It lists the project roles you hold in your platform, like Project Manager, with how many projects each covers. Pick a role to keep only the projects where you hold it, or leave it on Any role. The box shows which projects are Covered and which are Not covered by roles.
Choose flags and project order
If Flags is on, pick which conditions should rise to the top whenever they come up in the logs. Click See example on any of them to see how a flag reads. Pick at least one: with none picked, the Flags section stays empty.
- Safety incidents & near-misses
- Schedule delays
- Subcontractor attendance issues
- Inspections
- Pending owner/architect decisions
- Sub crew size changes
- Delivery issues
- Equipment returns
- Weather impacts
- Shout-outs
If Project activity is on, How should projects be arranged? gives you two settings:
- Order by: Status puts projects with active issues first and quiet ones after. Risk puts the highest-risk projects first. A–Z lists them alphabetically.
- Silent projects, for projects with no reports: Omit drops them, Note lists them at the end, and Highlight calls them out at the end as worth a look.
A super who stopped calling is worth knowing about, so on a portfolio brief, Highlight is a good choice.
Set how it reads
Under How should your brief read?, three dials shape the writing. The preview shows a sample project under your settings.
- Detail: Low, Medium or High
- Low gives one bullet per item, with no context. Medium adds the reasoning behind issues and rolls routine sub activity into a summary. High gives sub-by-sub crew counts, named people, and the reasoning behind every issue.
- Emphasis: Issues, Balanced or Wins
- Issues puts problems, delays and blockers first on each project. Wins puts progress and completions first. Balanced orders by significance.
- Format: Tight, Contextual or Both
- Tight is grouped bullets, built for a quick read on a phone. Contextual is short sentences, built for reading. Both puts headlines up top and the detail below.
A new brief starts at Medium, Balanced and Both. Leadership covering many jobs usually wants Low or Medium. A PM on one or two jobs usually wants High.
Pick days, time and text
Pick the days
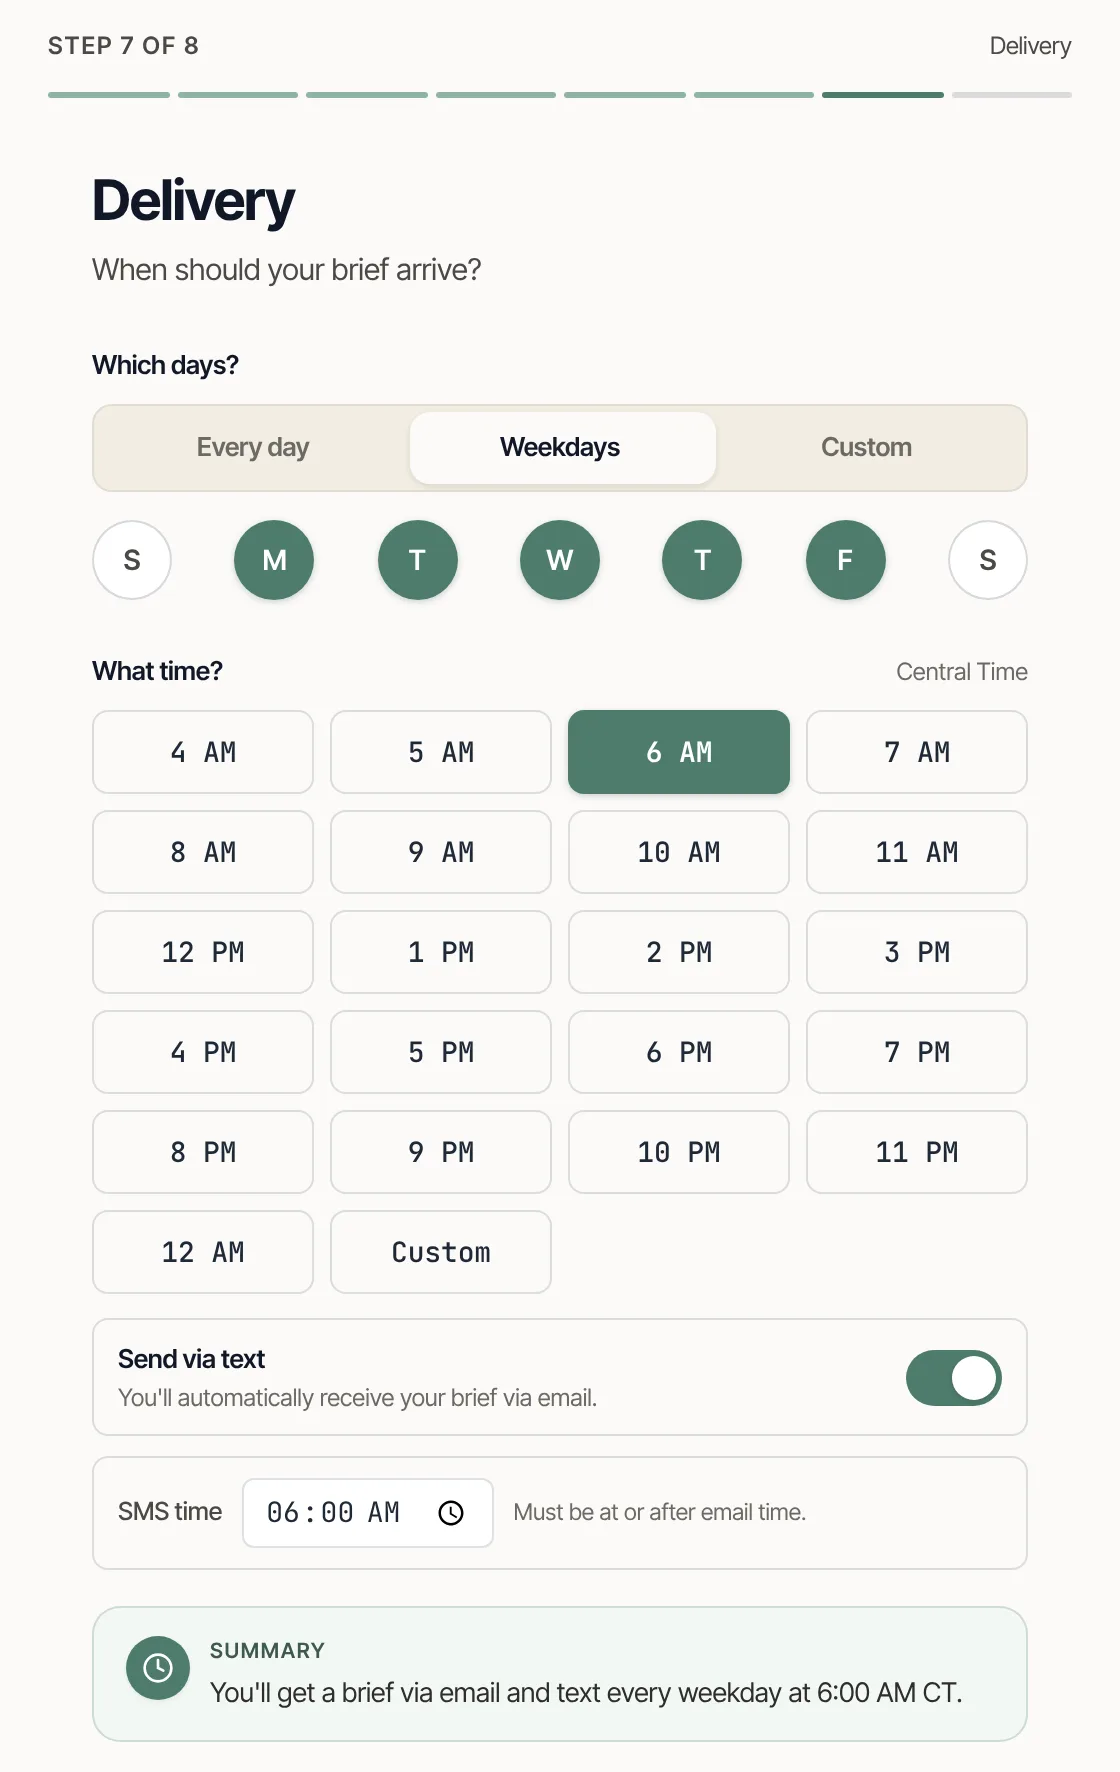
Under Which days?, choose Every day, Weekdays or Custom, or tap the day circles to build your own.
Pick the time
Under What time?, pick any hour from 4 AM to 12 AM. Times are in Central Time. For a time that isn’t on the hour, choose Custom.
Add a text, if you want one
Your brief always comes by email. Turn on Send via text to get a text with a link too, then set the SMS time. It can match the email or come later, but not earlier. The text needs a phone number on your profile.
A summary at the bottom says it back to you, for example You’ll get a brief via email every weekday at 6:00 AM CT.
Review and save
The last screen shows all your choices. Tap any of them to go back and change it. Then click Create Brief, or Save Changes if you’re editing. Changes apply from your next brief.
To change anything later, open setup again the same way. Your settings will be filled in.
Listen and share
Every brief has audio. Click Listen to this brief in the email, or Listen on an open brief, to hear the whole brief read aloud.
To pass a brief on, open it and click Copy public link. Anyone with the link can read it and listen without signing in.
Set up a brief for someone else
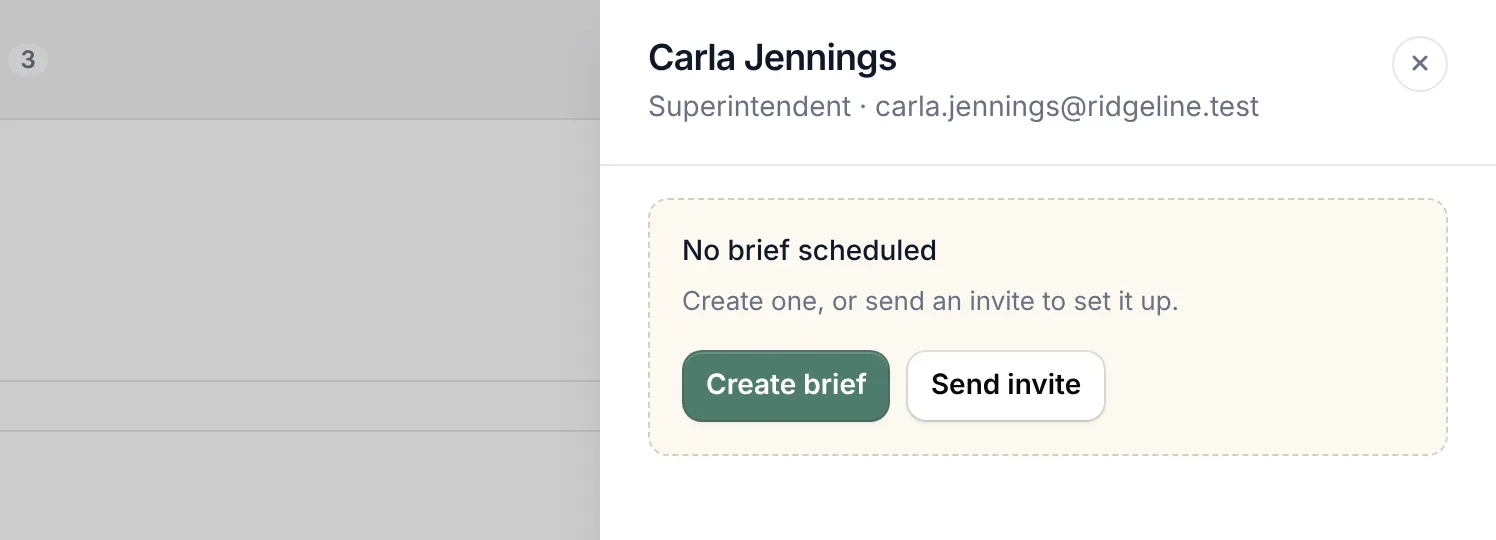
Go to Settings → Users and click the person’s Briefs cell. It reads Set up if they don’t have a brief. A panel opens with two choices.
Create it for them
Click Create brief. Setup opens with their name on it, and the first scope option reads Projects {name} is on, following their project teams, not yours. Their brief goes to them. To change it later, use Edit in the same panel.
Invite them to set it up
Click Send invite. They get an email titled {Your name} invited you to set up your brief with a Set up my brief button. The button signs them in and opens setup.
- The link lasts 7 days.
- It stops working once they save their brief.
- Sending a new invite cancels the old link.
- An old link shows This invite isn’t valid anymore. Send a fresh one.